Trial guide
IPCS Smart BIM Trial Guide
From signing up and uploading an IFC file to viewing the model in the 3D viewer — just follow the screens and steps.
- Time needed
- About 10 minutes (including model conversion)
- What you need
- An email address or a Google account
- Supported files
- IFC (.ifc)
STEP 1–3
Create your account
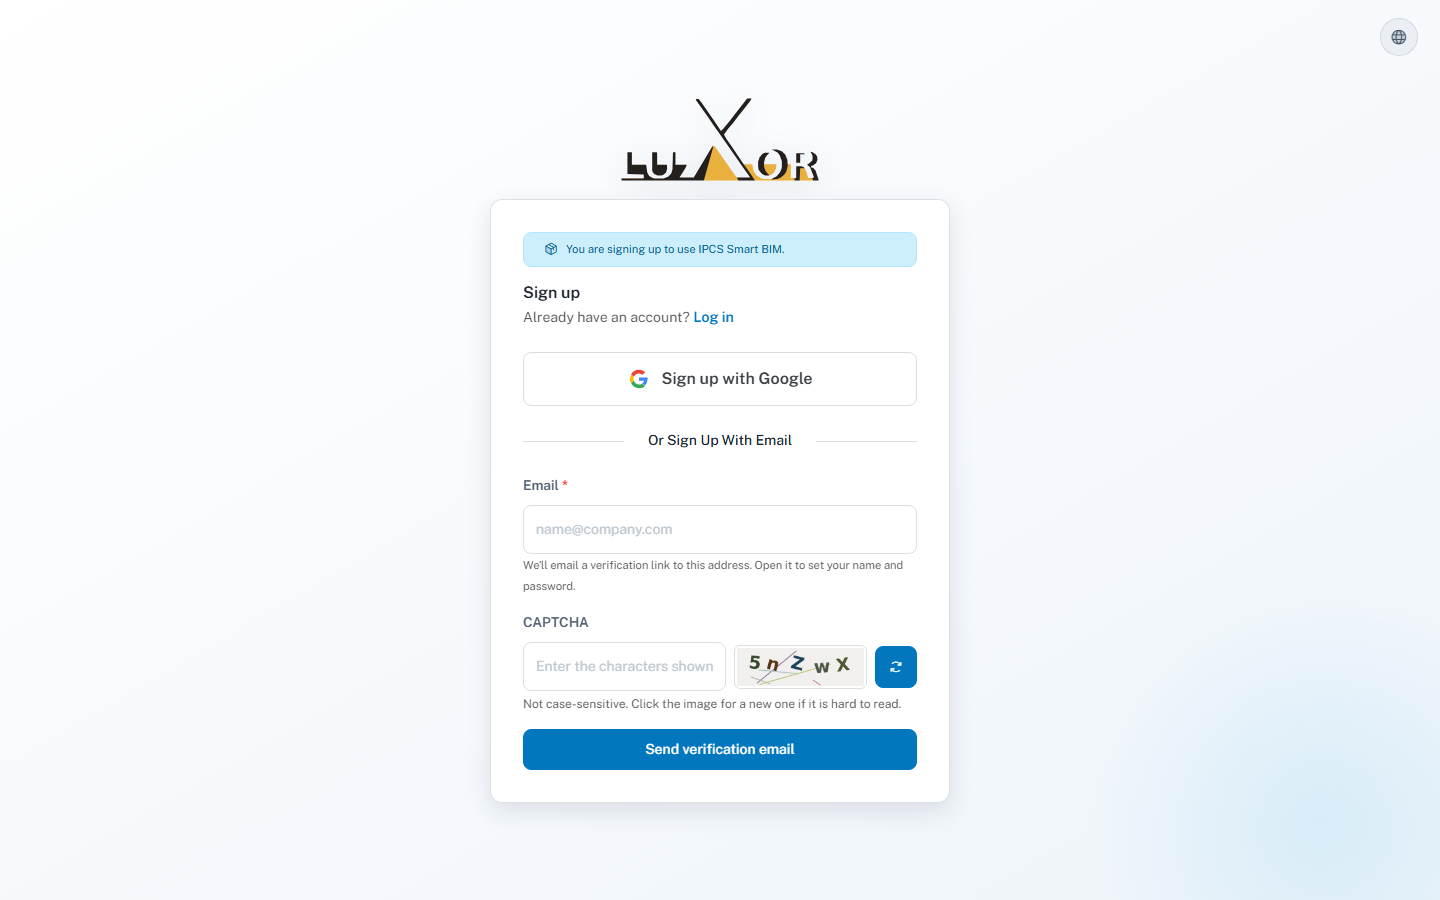
Enter your email address
Click "Start free trial" to open the sign-up page. Choose "Sign up with Google", or enter your "Email" and the "CAPTCHA" characters, then click "Send verification email".
Tips
- If you sign up with Google, your Google email address is filled in for you. Then click "Send verification email".
- The CAPTCHA is not case-sensitive. If it is hard to read, click the image to get a new one.
Verify your account
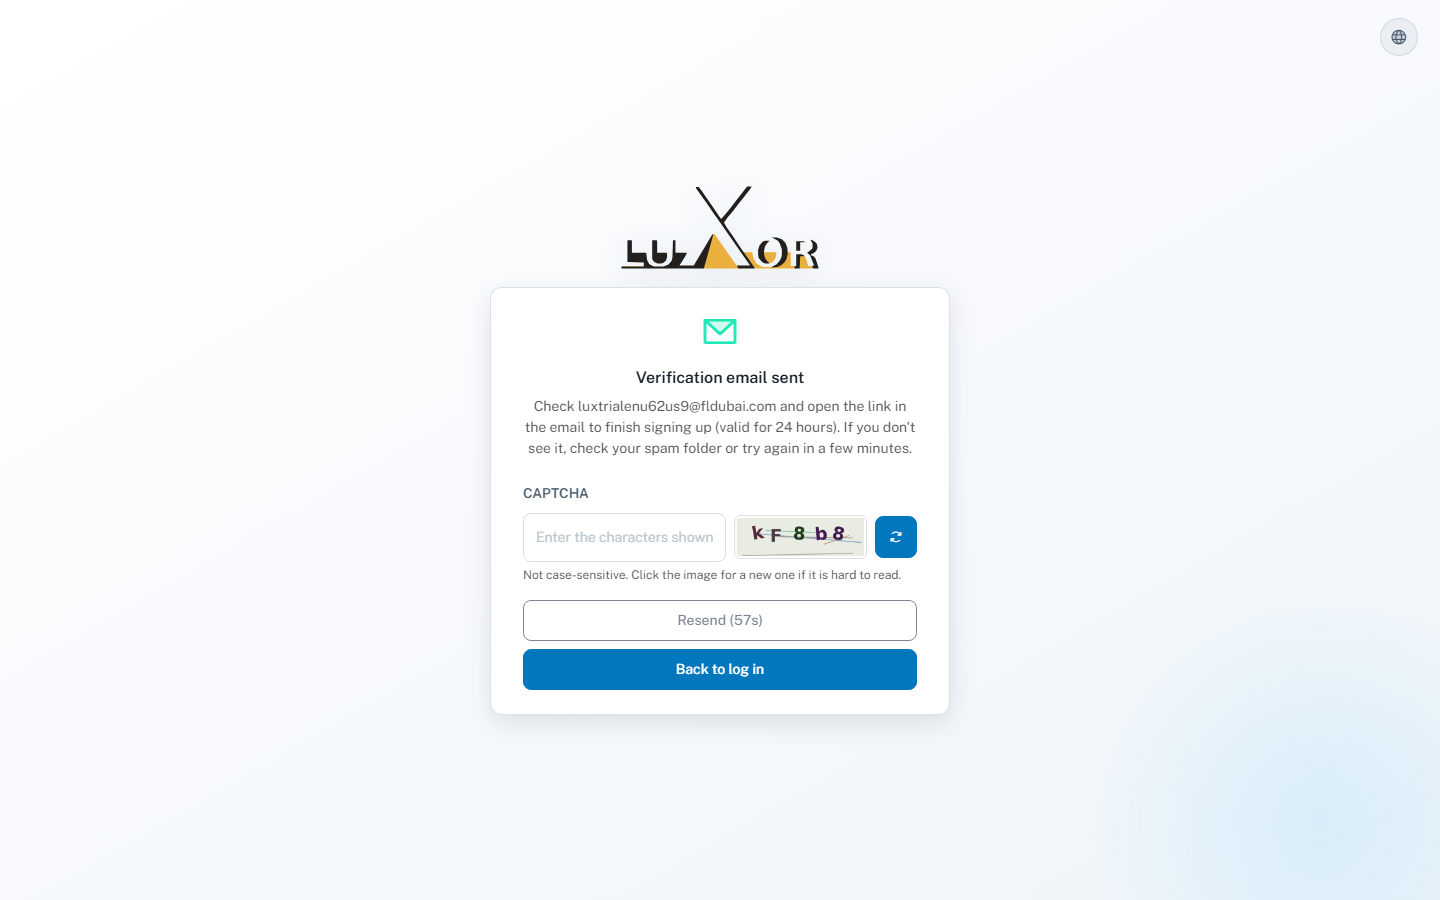
When you see "Verification email sent", open the email and click "Complete registration". The link is valid for 24 hours and can be used only once.
Tips
- If the email doesn't arrive, check your spam folder. If it still hasn't arrived after a few minutes, click "Resend".
Set your name and password
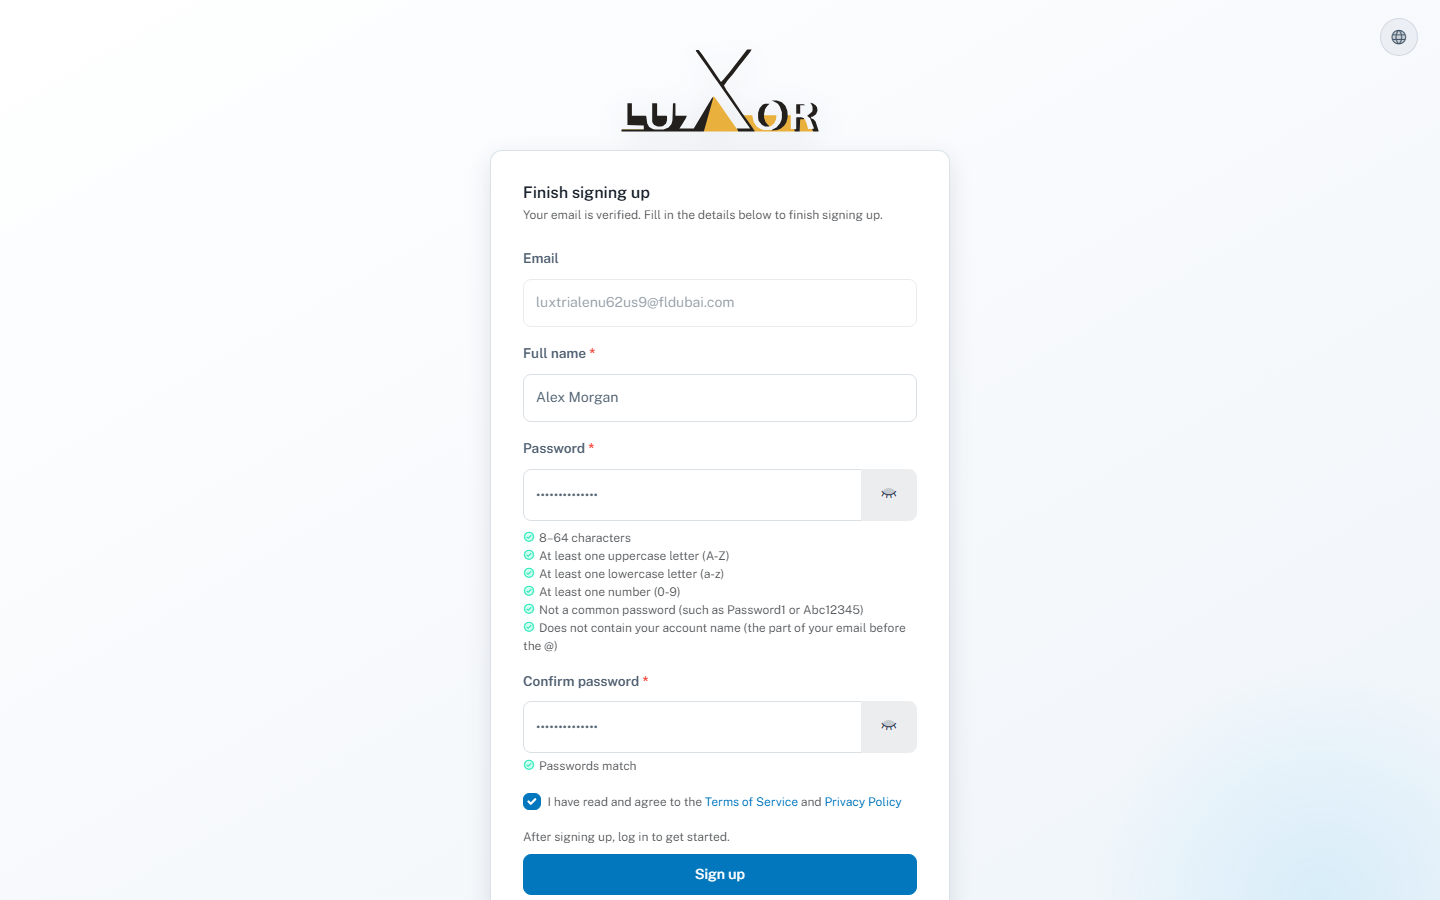
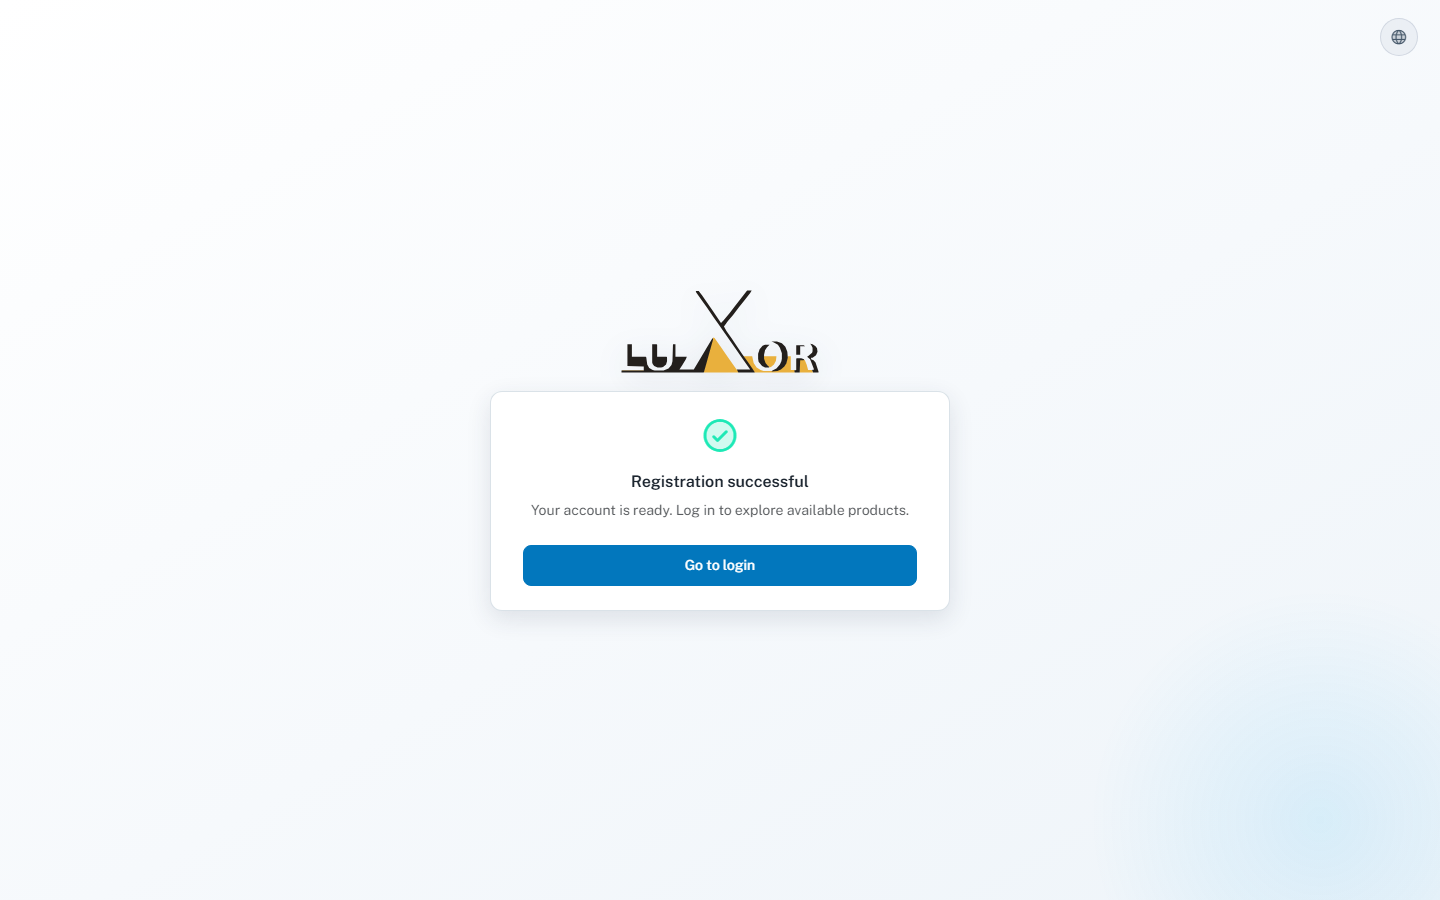
On the "Finish signing up" screen, enter your "Full name", "Password" and "Confirm password", agree to the Terms of Service and Privacy Policy, and click "Sign up". When you see "Registration successful", click "Go to login".
Tips
- Passwords must be at least 8 characters and include uppercase letters, lowercase letters and numbers.
- The name you enter becomes the name of your personal workspace.
STEP 4–6
Sign in and start your trial
Sign in
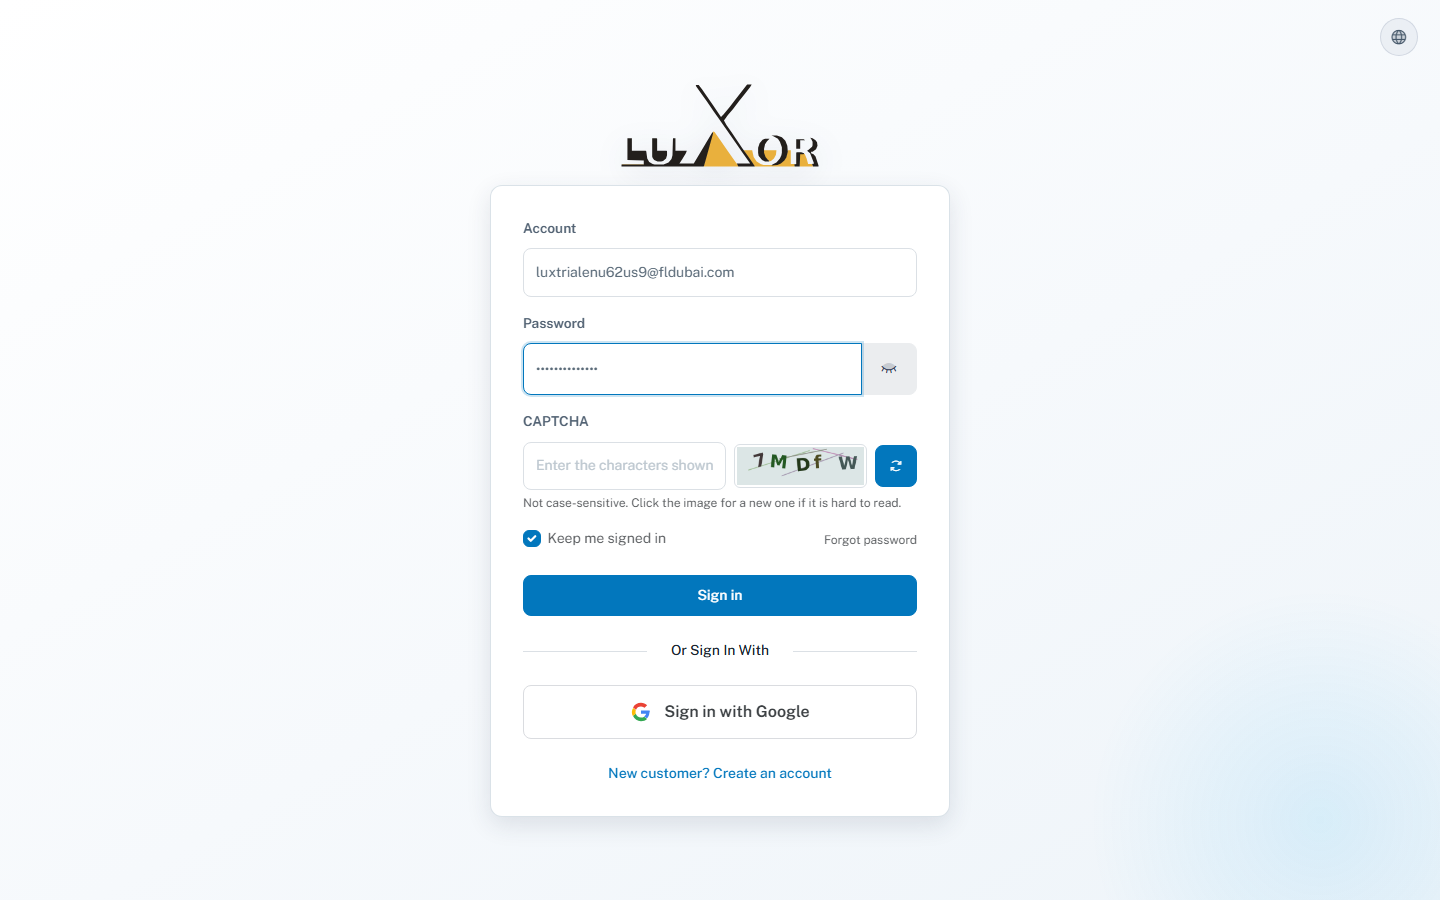
Enter your email address under "Account", your "Password" and the "CAPTCHA" characters, then click "Sign in".
Tips
- The first time you sign in, you'll see "Would you like a quick tour?". If you already know your way around, click "No thanks".
Start your trial
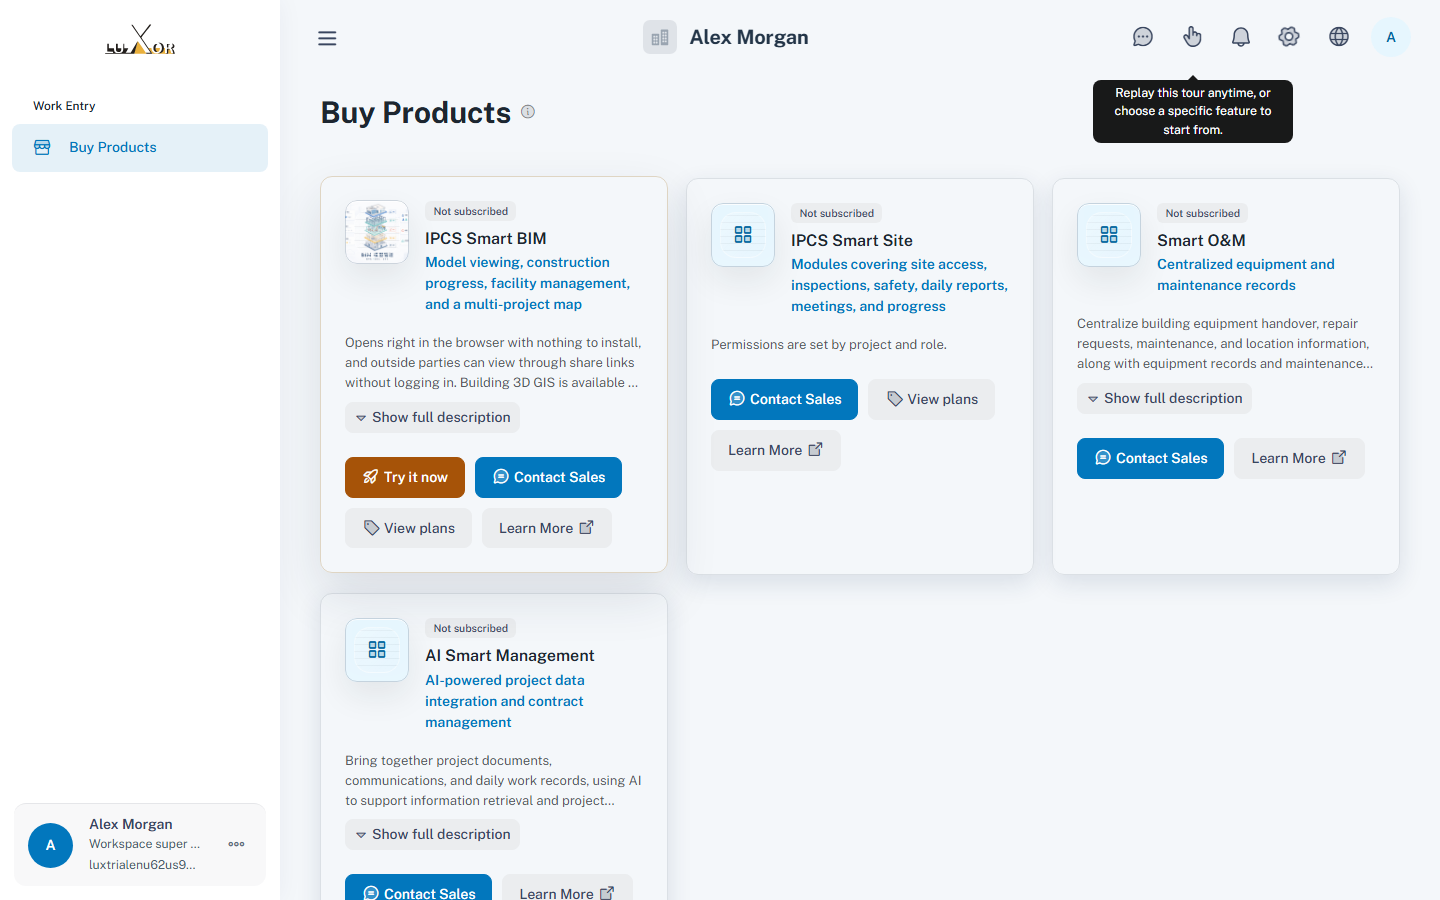
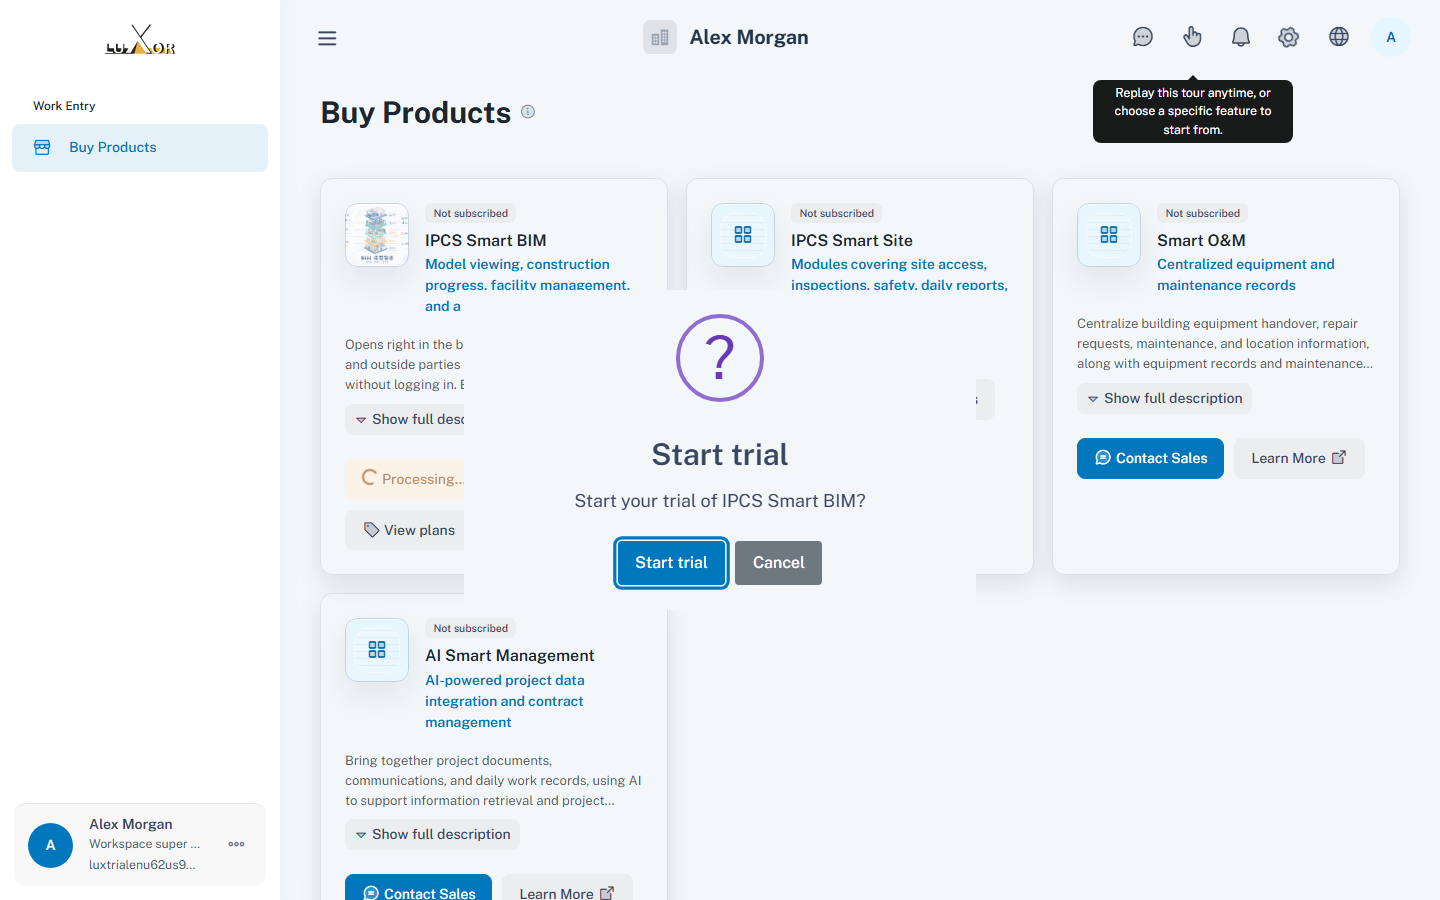
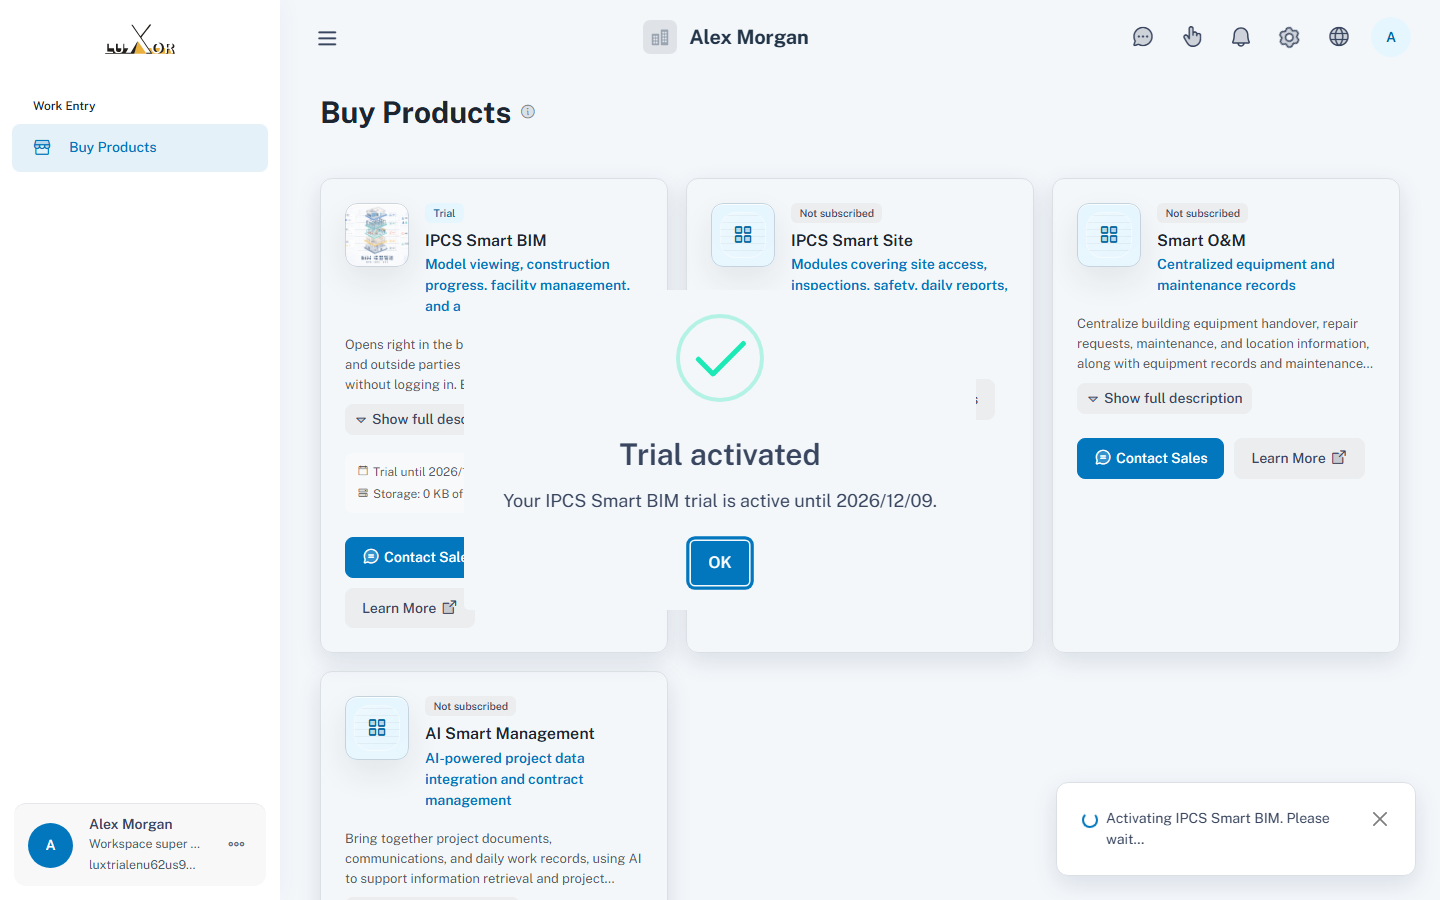
On "IPCS Smart BIM", click "Try it now". When "Start your trial of IPCS Smart BIM?" appears, click "Start trial". You'll see "Trial activated" and the date your trial ends. Click "OK".
Tips
- Each person can use the trial once.
Create your first project
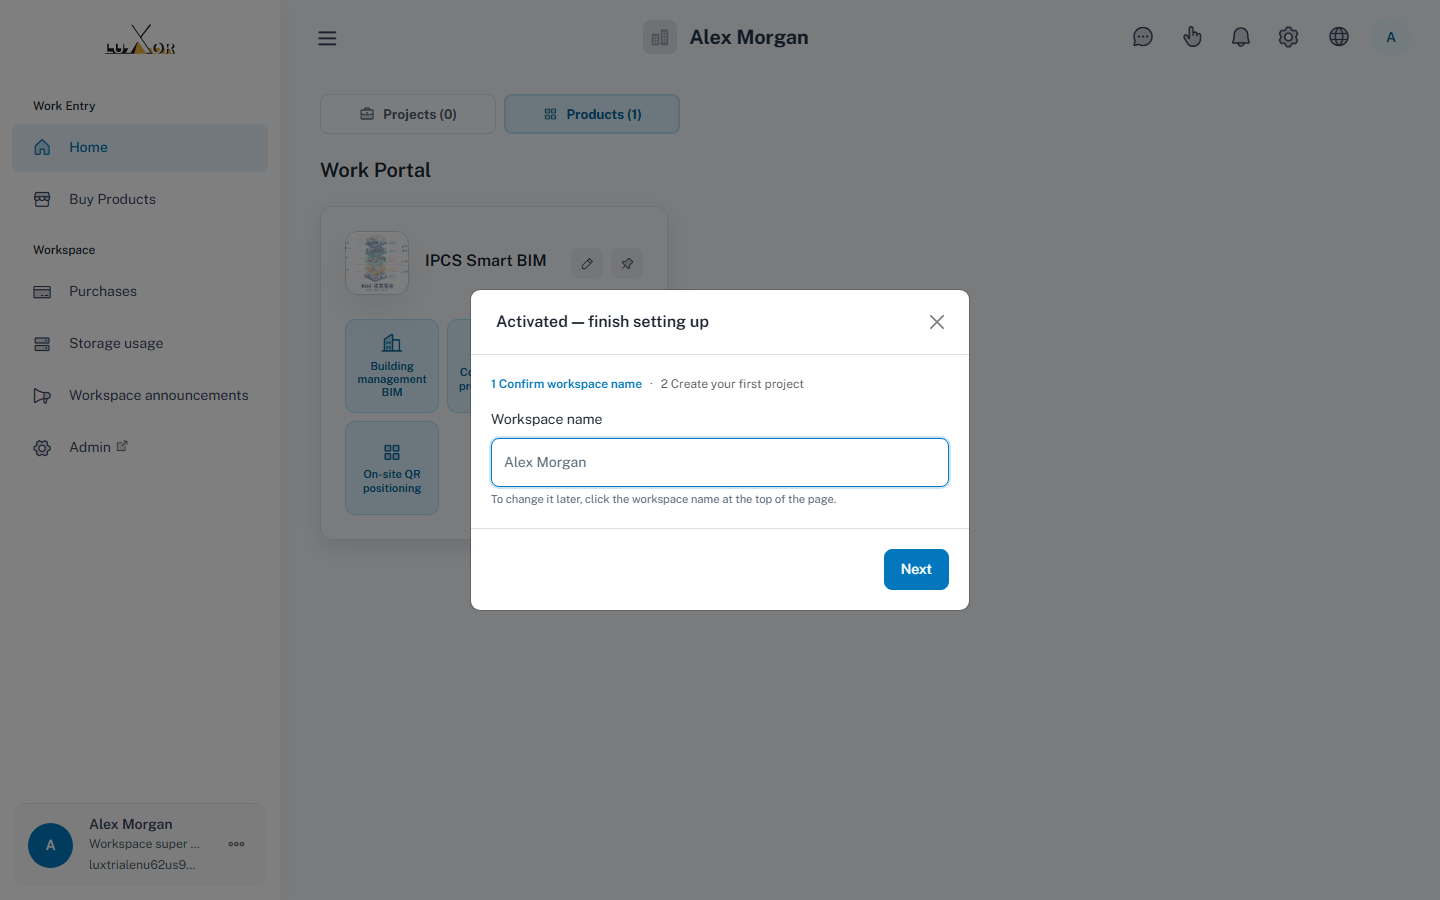
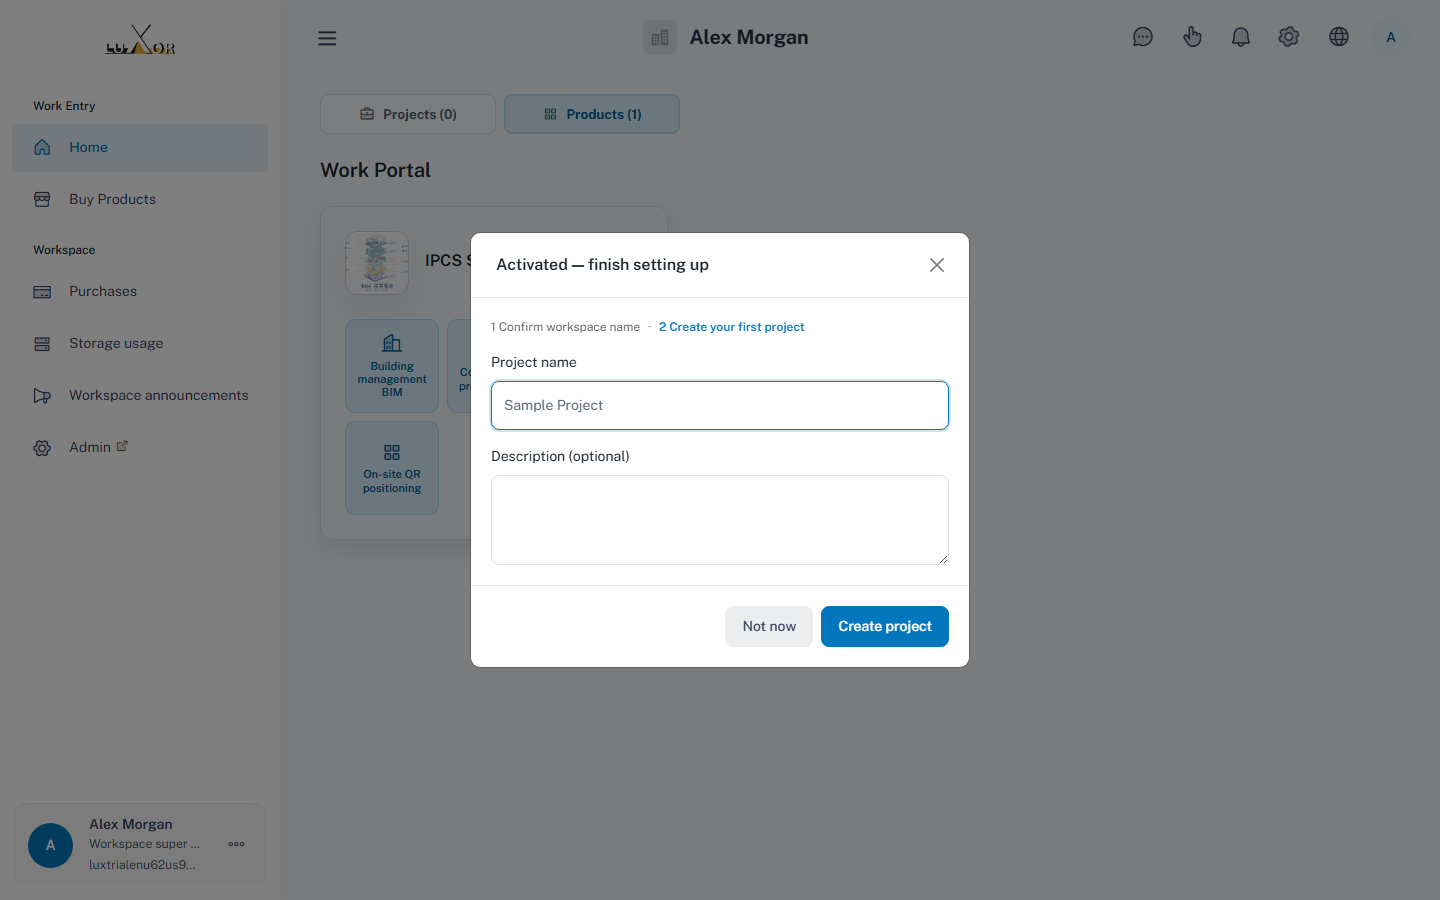
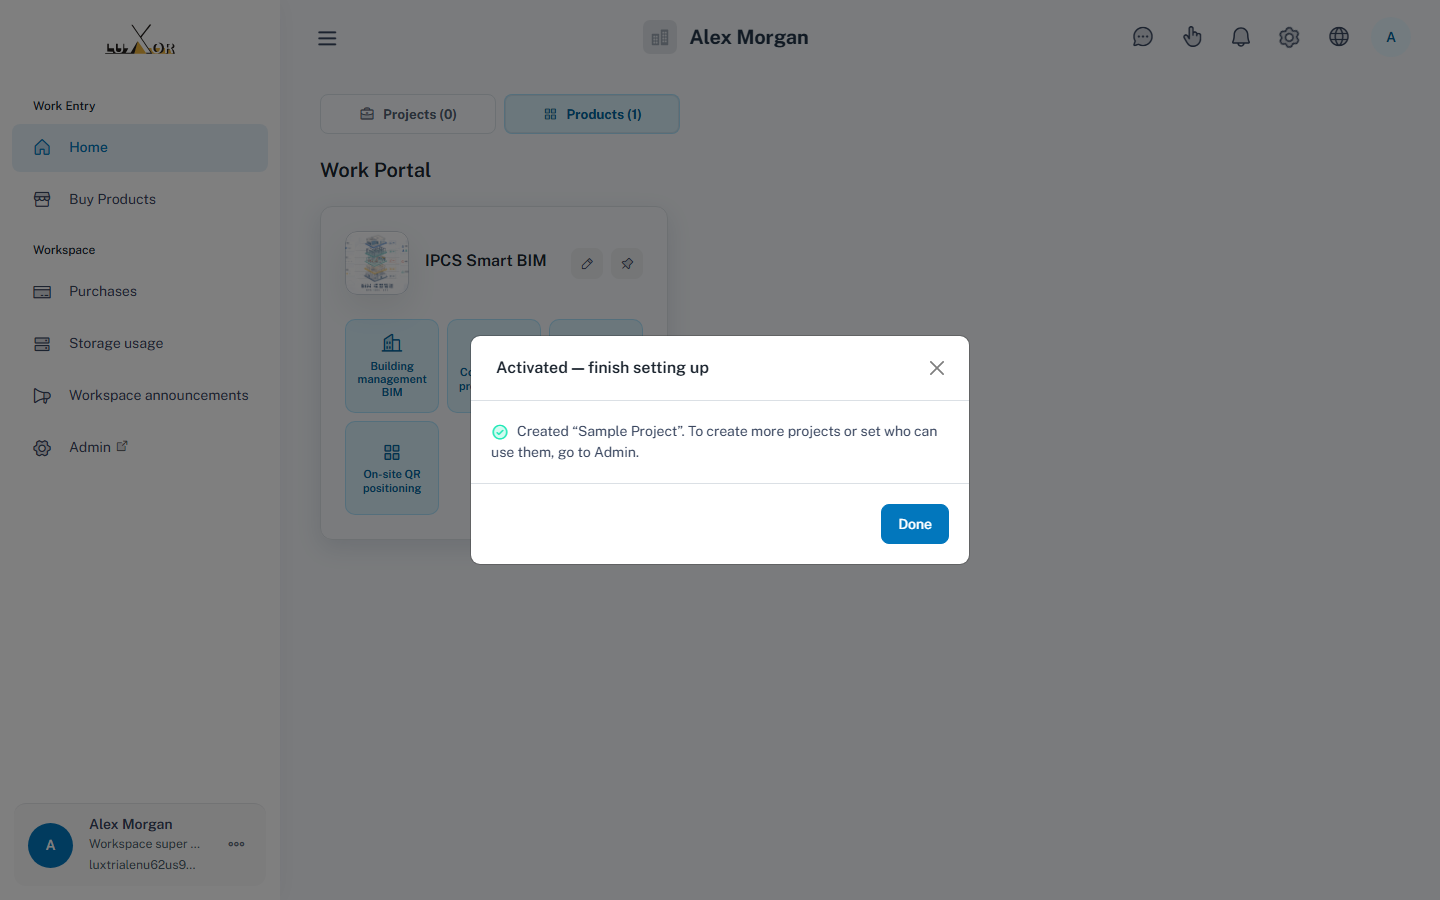
Next, "Activated — finish setting up" appears. In step 1, "Confirm workspace name", check the name and click "Next". In step 2, "Create your first project", enter a "Project name" and click "Create project". When you see that the project has been created, click "Done".
Tips
- To change the workspace name later, click the workspace name at the top of the page.
- To create a workspace for your team, open the "..." account menu at the bottom left and choose "Add workspace".
STEP 7–12
View models in Smart BIM
Open Smart BIM
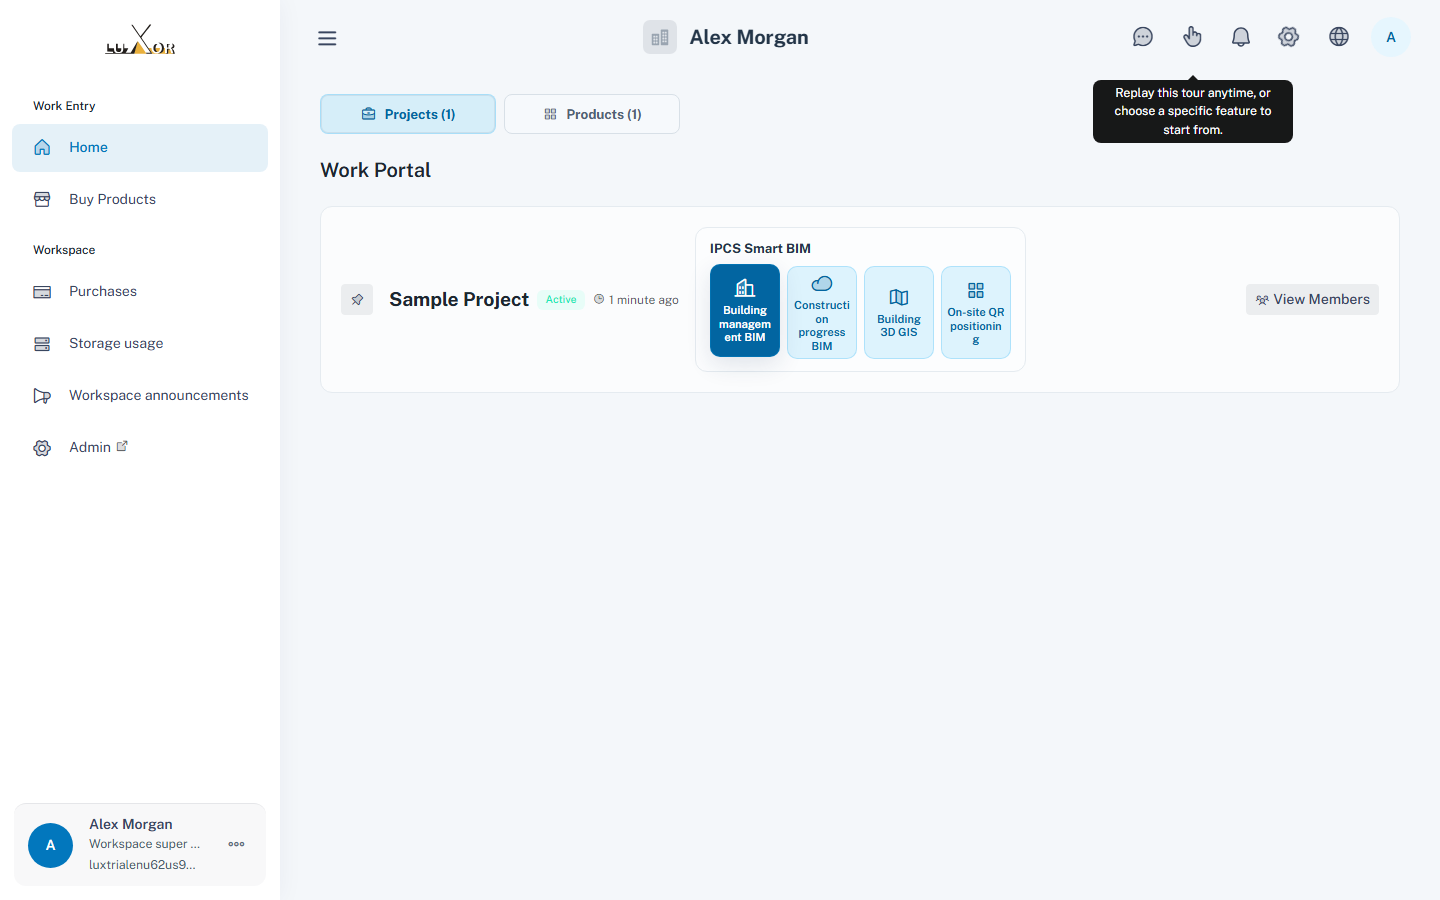
On the home page, find the project you just created and click "Building management BIM".
Create a folder and a model set
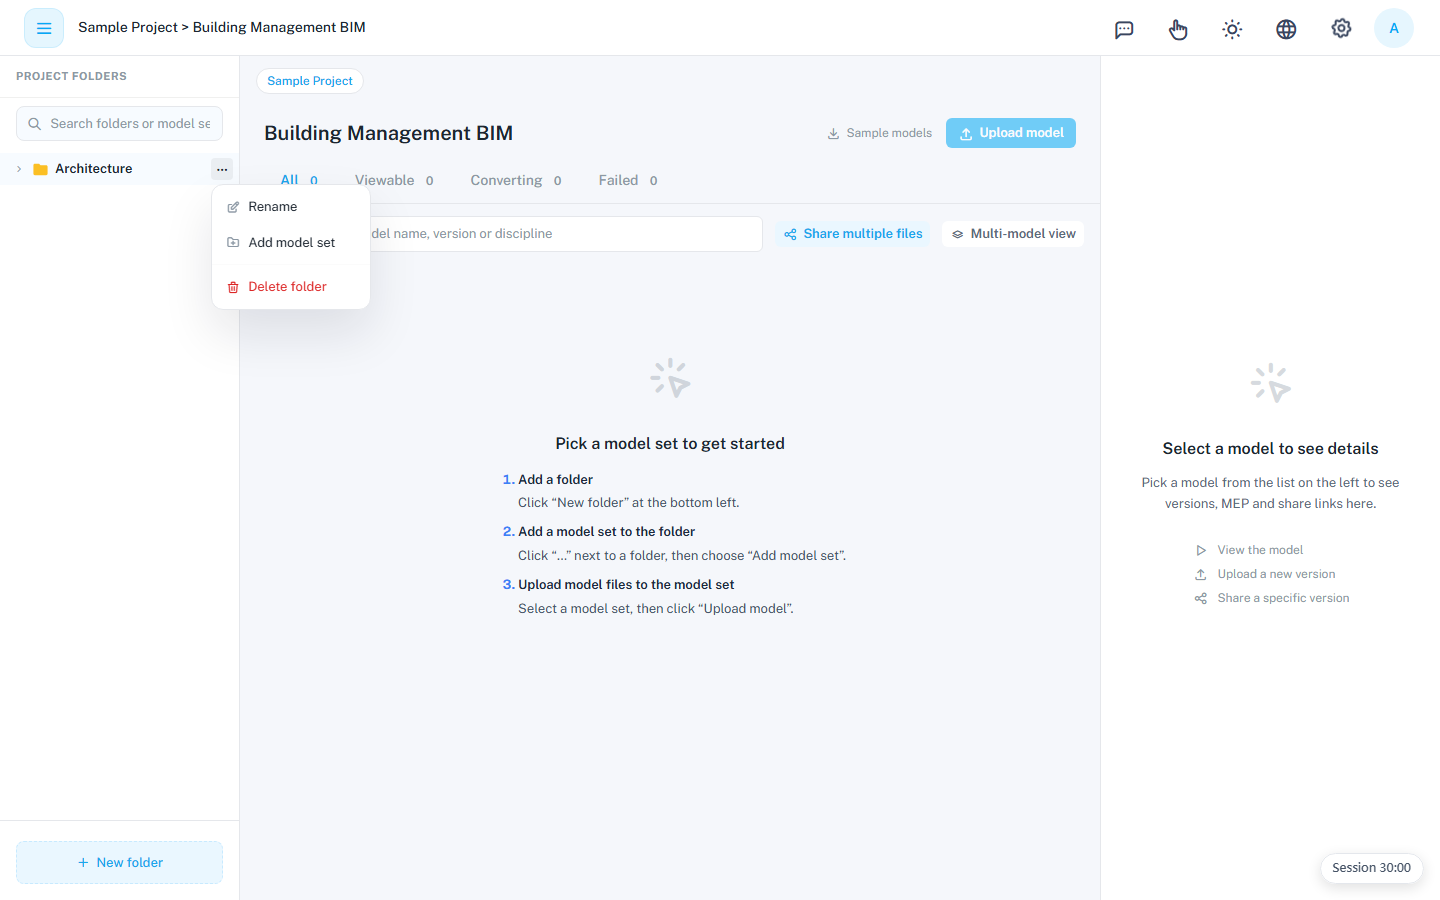
First, create a place for your models. Click "+ New folder" at the bottom left, enter a name and click "Create". Then click "..." next to the folder, choose "Add model set", enter a name and click "Create".
Tips
- Organizing folders by purpose and model sets by building makes models easier to find later.
- Once you've created a model set, you can use "Upload model".
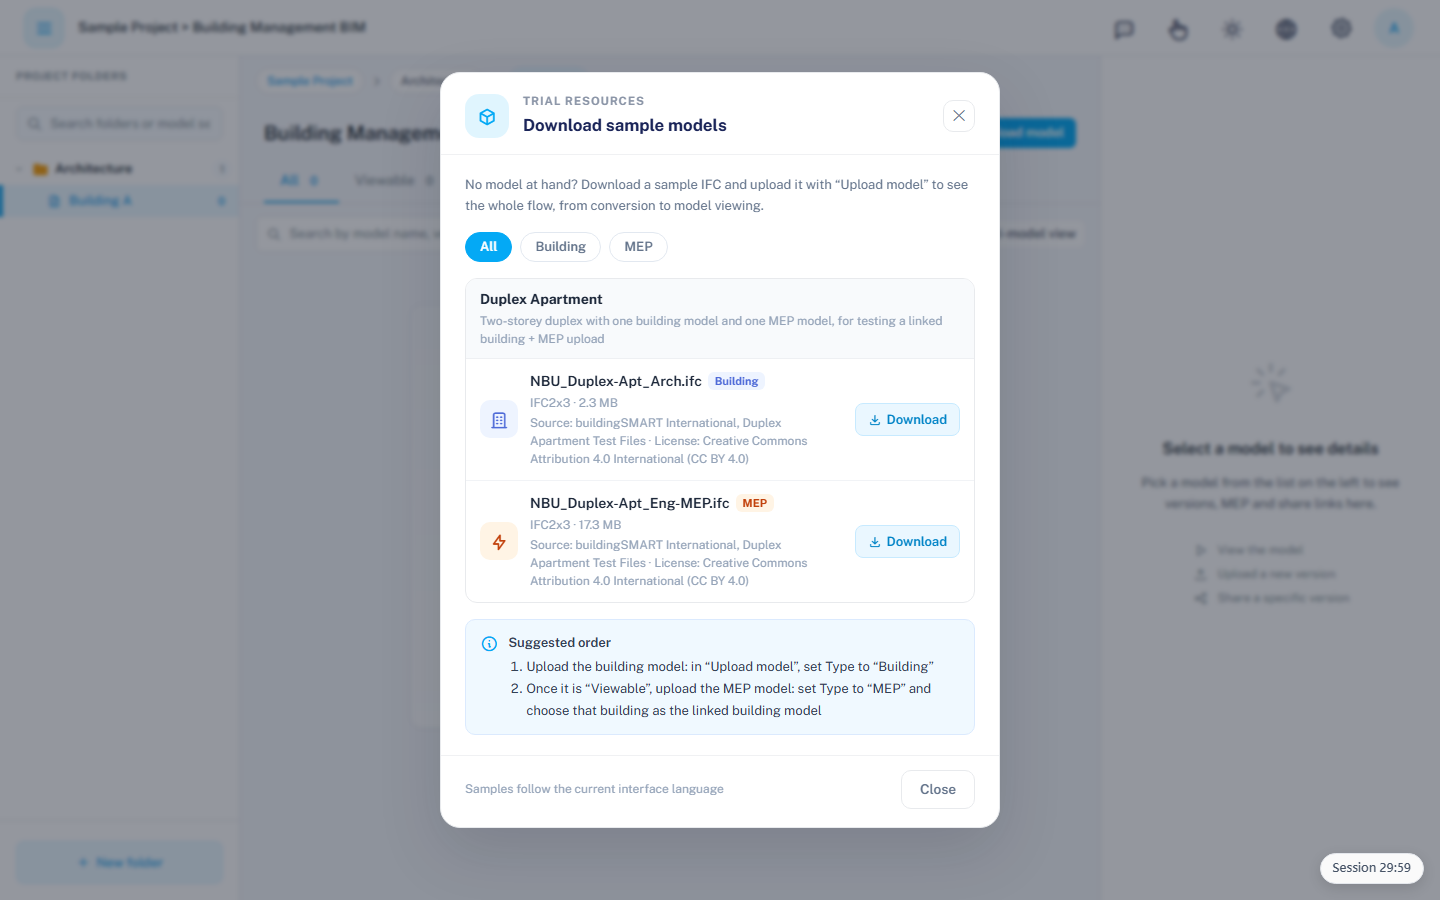
Download the sample model
Click "Sample models" at the top of the screen. In the "Download sample models" window, click "Download" next to the building IFC file.
Tips
- If you already have an IFC file, you can use your own file instead.
- There is also an MEP sample. Upload it after the building model has finished converting.
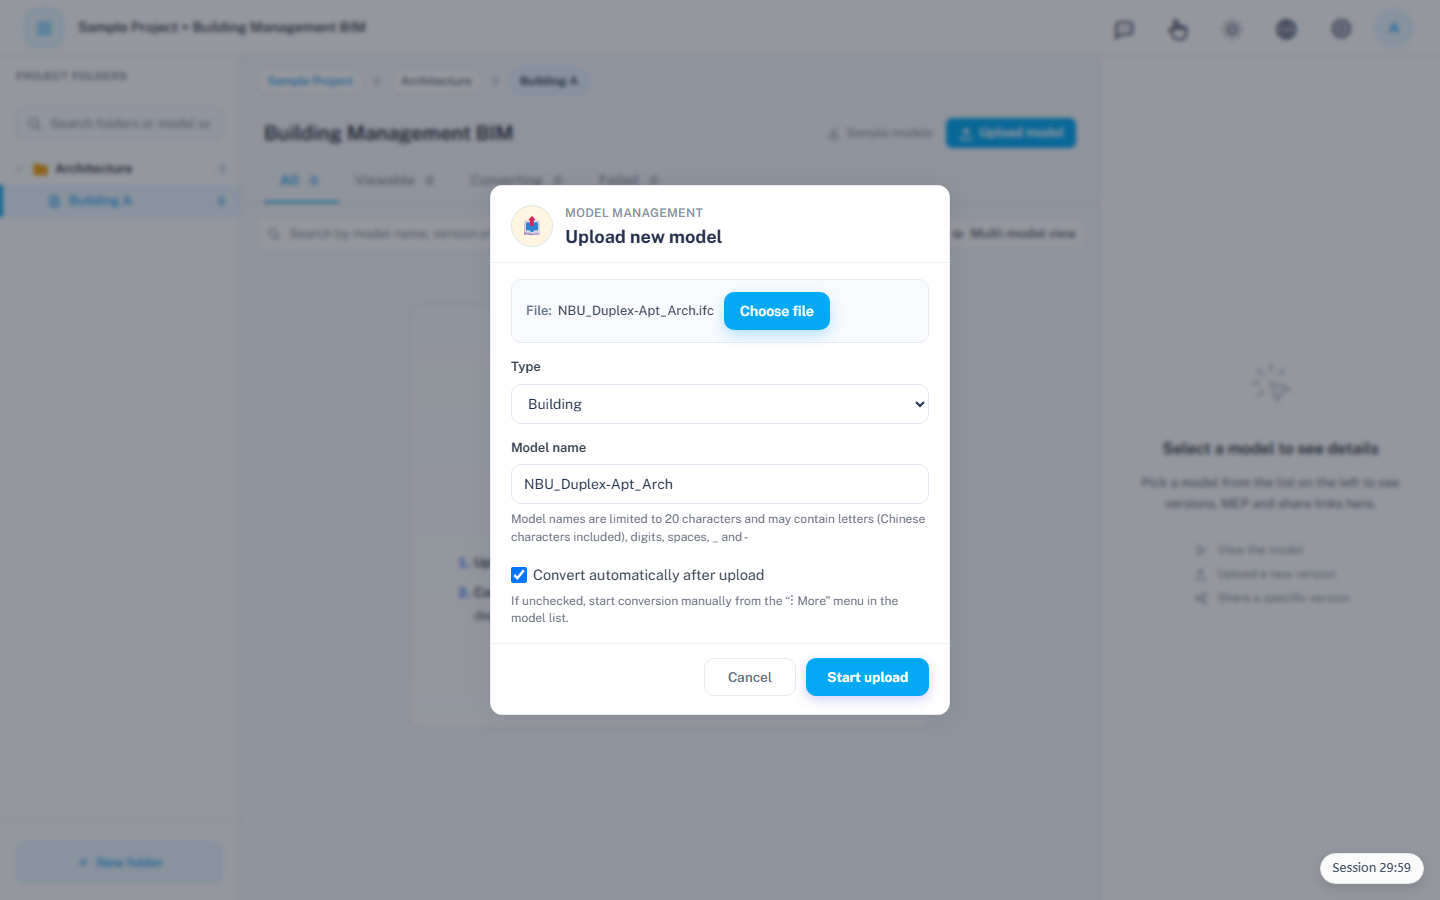
Upload the IFC file
Click "Upload model". In the "Upload new model" window, click "Choose file" and select the IFC file. "Type" is set to "Building" by default, and "Model name" is filled in from the file name. Make sure "Convert automatically after upload" is checked, then click "Start upload".
Tips
- Only .ifc files can be uploaded.
- Model names can be up to 20 characters.
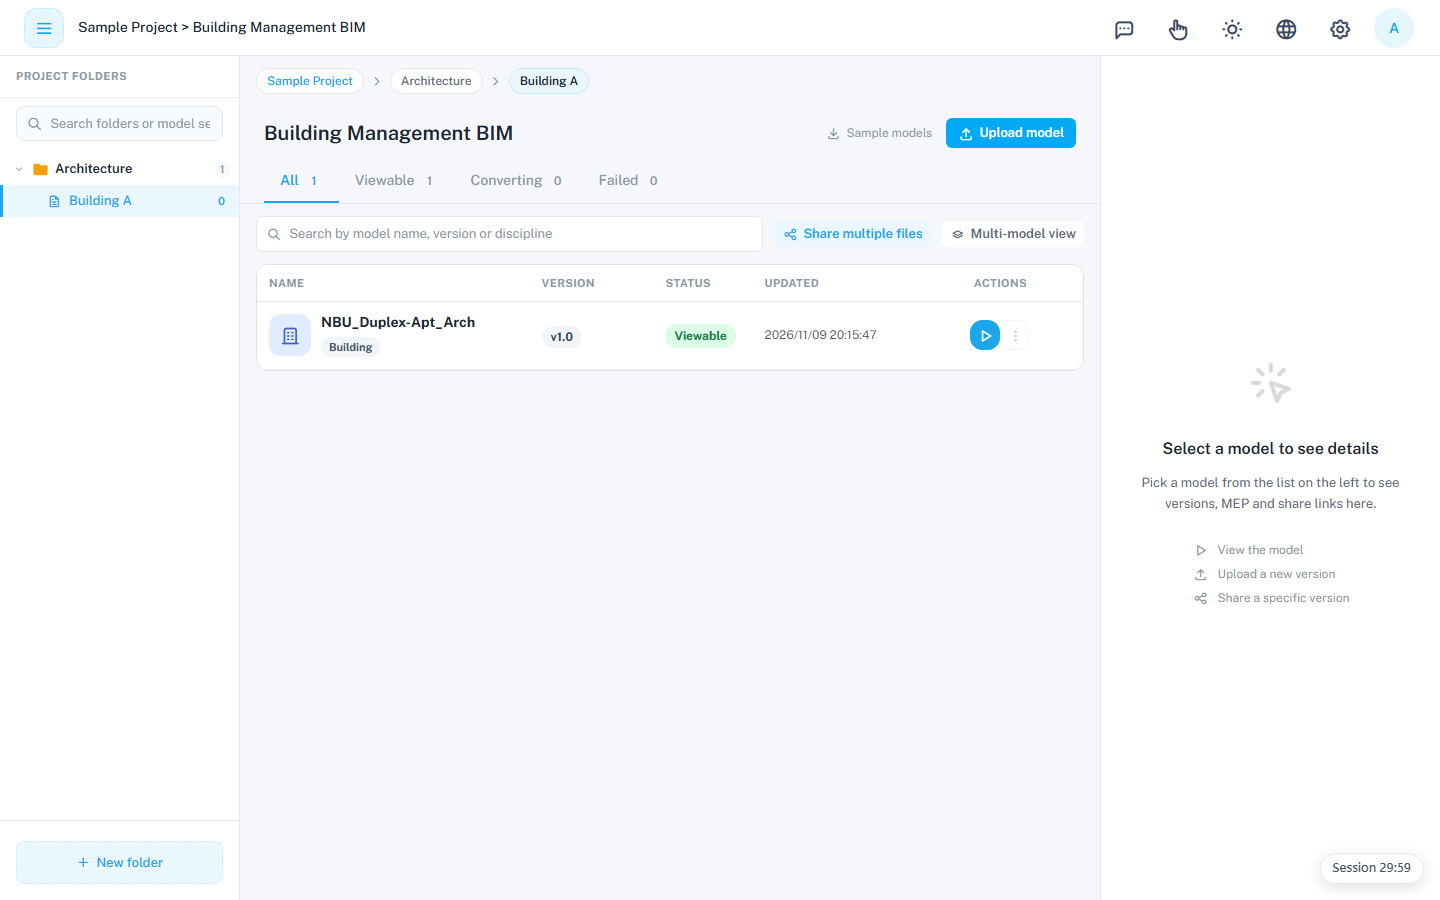
Wait for conversion to finish
Conversion starts automatically after the upload. Models being converted appear on the "Converting" tab, and conversion usually takes about 1–10 minutes. When the status changes to "Viewable", it's done.
Tips
- The list updates automatically. Keep this page open while the model is converting.
- Upload MEP models after the building model is "Viewable": set "Type" to "MEP" and choose the "Linked building model".
View in the 3D viewer
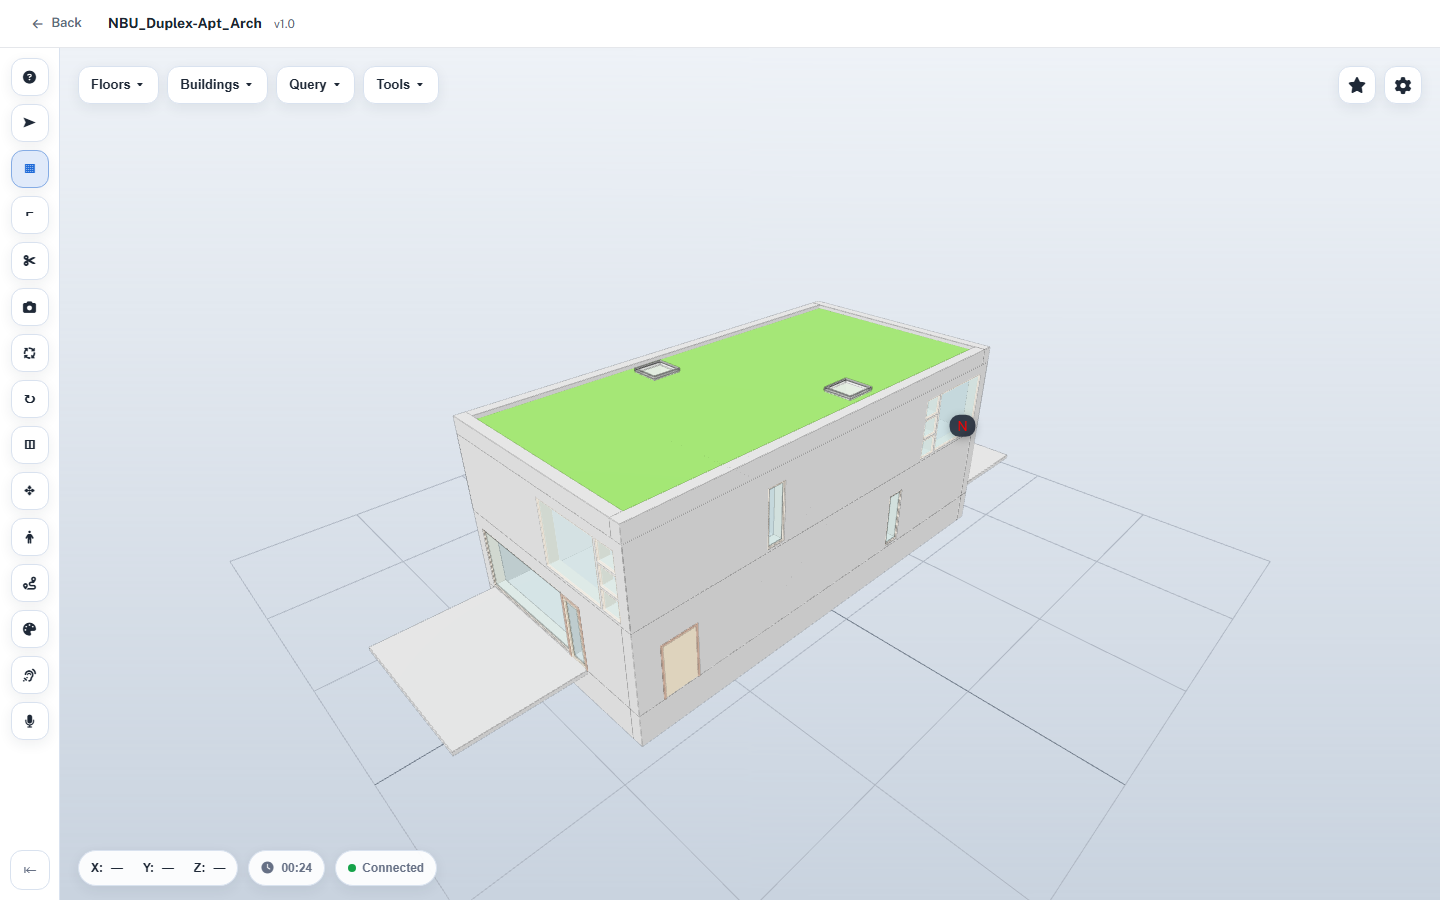
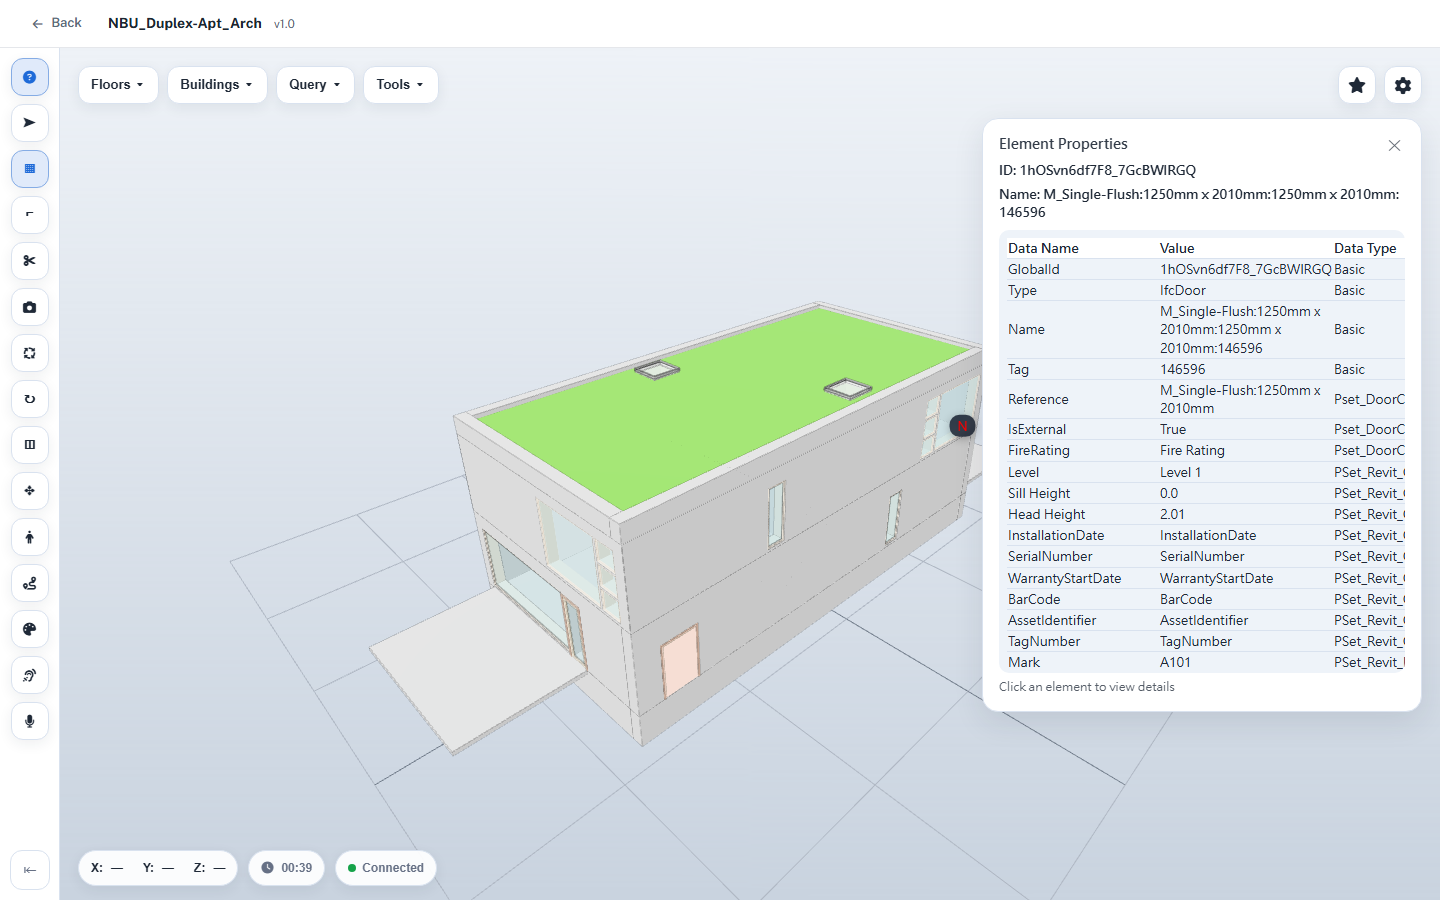
Click a model in the list to see its details on the right, then click "View model" to open the 3D viewer. Click "Inspect Element" at the top of the left toolbar, then click an element to see its properties under "Element Properties". To go back to the list, click "Back".
Tips
- The viewer's language follows the platform's language setting.
FAQ
I didn't receive the verification email.
Check your spam folder first. After a few minutes, click "Resend" and we'll send it again.
I can't click "Sample models" or "Upload model".
Select a model set on the left first. If you don't have one yet, create one in STEP 8.
Can I upload files other than IFC?
Currently only IFC (.ifc) files are supported. Please export an IFC file from your BIM software.
The conversion shows "Failed". What should I do?
The IFC file may not be readable. Export the IFC file again from your BIM software and upload it again.
How long is the trial, and what's included?
The date your trial ends is shown when you start the trial. For the features included, see the trial plan on the product page and the plans and pricing page.
*Screens are from a development version and may differ from the actual product.
*The sample building and MEP models are publicly available under the CC BY 4.0 license.